Peanut Butter Rice Crispy Cake! A healthy, vegan & gluten free version!

Can you believe it a healthy, vegan & gluten-free version of rice crispy cake!! Well it is true! Thanks to the amazing Ella from Deliciously Ella for sharing this recipe! I came across Ella’s recipe last night and at midnight (I was procrastinating from school work) I decided that I needed to make rice crispy cake now! On that note, is it rice crispy squares or rice crispy cake? Karim & I always argue about this one! I’m a cake girl and he’s a square guy!

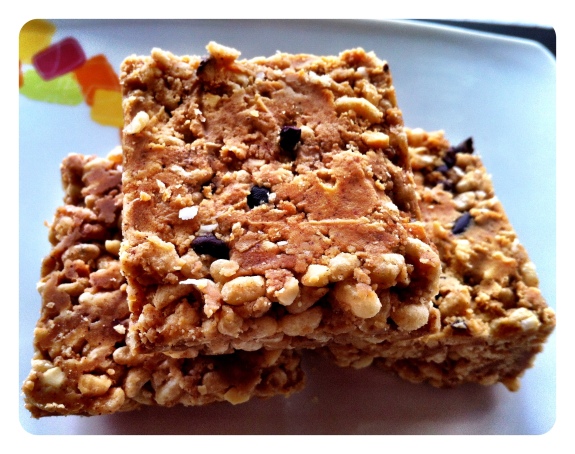
A vegan & GF version of rice crispy cake! Made with peanut butter!

A vegan & GF version of rice crispy cake! Made with peanut butter!

Ella makes her rice crispy squares with almond butter! That was my original plan but I was out of almond butter & couldn’t wait until today! So instead I made the cake with raw peanut butter! Karim loves peanut butter & rice crispy squares; so I figured he’d enjoy this!

Inspired & modified from Ella’s recipe: http://deliciouslyella.com/2013/02/02/healthy-rice-crispy-treats-vegan-gluten-free/

You’ll need:

1 – 1.5 cups of raw peanut butter or nut butter of choice

2 cups of puffed brown rice (this makes it gluten-free) & adds fibre for a happy tummy:)

4 tablespoons of Agave

1 tablespoon of extra-virgin coconut oil

1 teaspoon of cinnamon (Ella’s recipe calls for 1 teaspoon of cinnamon but I love cinnamon so added more. A few dashes here & there)

I also added:

1 teaspoon of vanilla (optional)

I topped mine with cocao nibs & coconut flakes (optional)

This recipe is super easy to make & doesn’t take long at all which is a huge bonus! Not that you really need a bonus because the taste will win you over!

In a sauce pan, add the peanut butter (nut butter), coconut oil, agave & vanilla. Over low-medium heat stir until a liquid starts to form. Pour the mixture into the mixing bowl that has the puffed brown rice & cinnamon. Mix well!

Add the mixture to a baking dish. Pat it down & feel free to top it off with cocao nibs or coconut flakes! I also coated my baking dish in coconut oil (not necessary but coconut oil is so delicious & healthy; I figured it couldn’t hurt). Place the baking dish in the freezer for an hour or two (I did two hours). Cut into squares, serve & enjoy! And as Ella said IF there are any left over squares place in the fridge.

I will warn you, they are so tasty AND addictive; there may be no leftovers! At 2am last night, Karim and I were enjoying them while doing school work (yes, the life of students). I also ate two squares for breakfast (which is so unlike me) but I figured peanut butter is a breakfast food 😉 The few that were left I took to work for the girls to try & they all loved the treat! On the way home I stopped at the grocery store and bought more almond butter & peanut butter! I can hardly wait to make more! They are a perfect afternoon pick-me-up for Karim & I while at school!

I hope you enjoy them as much as we do!

Have a good week,

Paige xo.

Ice Dreams- This weekends dessert!

Eat your dessert! Especially when it tastes delicious!

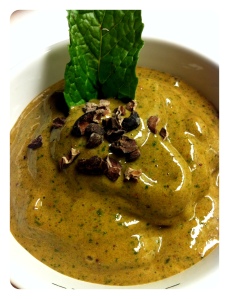
Dessert last night was Mint Cacoa Chip Ice Dream! Inspired by my favourite Ice Cream as a kid; mint chocolate chip! Only the Cacoa Chip version is vegan & healthy… a dream come true really!

Mint Cacoa Chip Soft Serve

Mint Cacoa Chip Soft Serve

Serves 1 happy tummy (makes 1 cup)

You’ll need:

2 frozen bananas

Handful of mint leaves. I used 1/2 cup – 3/4 of a cup. (I love mint) You can start with a few leaves and add more when you get to the mint flavour that you love!

1 tablespoon of Cacoa powder

1 tablespoon of Cacoa nibs

1/2 a tablespoon almond milk (optional). *If you do not have a high power blender you may have to add a few dashes of almond milk here & there to help with the blending process. Start with a dash & add if you need too; you don’t want to add to much and have a runny ice cream.

1 teaspoon vanilla extract

1/2-1 teaspoon peppermint extract/oil

Place all ingredients in blender & blend! I have a Blendtec and there is an ice cream option which works wonderful! I use to make this in my Magic Bullet, just add a little almond milk here & there! Top with cacoa nibs & enjoy every single bite!

Options:

– Add vegan chocolate chips

– A pinch of salt really brings out the flavours

– Peppermint extract/oil & vanilla is not mandatory. By simply adding banana, cacao & mint leaves you will still create an amazing mint cacoa ice dream!

– Add a handful of spinach! You can’t taste the spinach & it adds a nice green colour!

– A dash of stevia if you’d like it sweeter!

– Add a piece of Giddy Yoyo mint chocolate. Or your favourite chocolate!

TIP: when freezing bananas: peel, chop into smaller pieces & place in freezer safe bag. Seems easy enough BUT after telling a friend that you can make “ice cream” out of bananas, he reported back to me that he just put a punch of bananas in the freezer and it didn’t work out so well.

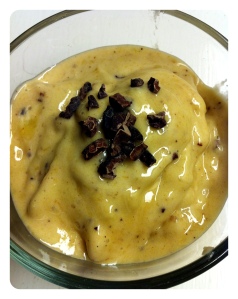
Dessert tonight was Peanut Butter Vanilla Soft Serve. (Another Ice Dream)

Peanut Butter Vanilla Soft Serve

Peanut Butter Vanilla Soft Serve

Feeds 1 tummy:

2 frozen bananas (cut into chunks)

1 tablespoon of peanut butter or nut butter of choice

1 teaspoon of vanilla

Place all ingredients in blender & blend until you have a soft serve ice cream texture!

Health Hint: Peanut butter & bananas are an excellent post-workout snack!

What is your favourite kind of ice cream? Can you create a healthier version ice dream?

Hope you all had a wonderful weekend! Don’t forget to treat yourself to some dessert!

Cheers,

Paige xo.

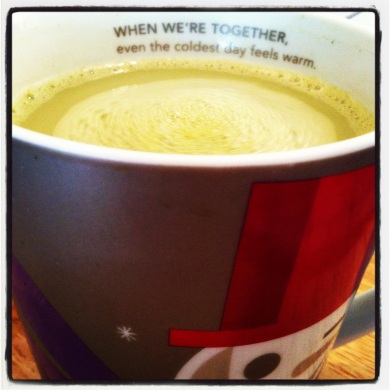
Green Tea Matcha Latte

How do you warm up on a cold winter day?

I am not a coffee drinker so my latte choice is a matcha latte (I am also a tea addict). Pure matcha does so much more then warm you up on a cold winter day (that is just one of the many benefits). Pure matcha offers more health benefits than green tea because when you ingest matcha you are drinking the whole leaf. Amongst matchas many benefits it: it is an antioxidant powerhouse, boosts metabolism and fights calories; boosts energy to help get you through your day whether at school or work leaving you without jitters and a caffeine crash.

Ingredients: 

Serving size: 1 Matcha tea latte

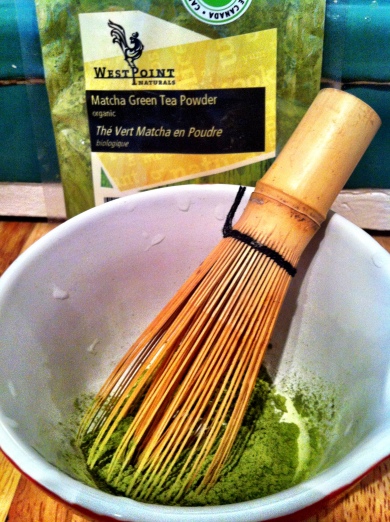
– Pure matcha powder

–  1 cup of almond milk (or milk or choice)

– 1/4 cup of water

ImageHow to make a Matcha Latte:

– On the stovetop, warm up your almond milk in a pot. Use a medium heat & whisk milk as it heats up.

– While milk is heating on the stovetop; add the 1/4 cup of boiled water to the teaspoon of matcha- vigorously whisk 1 teaspoon of matcha in a zig-zag motion until all lumps & clumps have dissolved.

-Once milk is steamed pour it into a mug and add  the matcha & water.

-Now enjoy!

-Feel free to sprinkle the top with matcha dust or my favourite is adding a dash of cinnamon.

Image

Happy Matcha.

Paige, xo.